Planning reactions and the lab journal
Planning the reactions (Author: Ruixu Mu)
Author: Ruixu Mu,
Effective experimental planning is the keystone of successful chemical synthesis, bridging theoretical design and practical execution. Unlike intuitive trial-and-error approaches, systematic planning involves the iterative refinement of stoichiometric parameters, reagent compatibility, and scalability constraints—all grounded in rigorous literature analysis and quantitative calculations.
We have a framework that we adhere to. After you have decided the whole route of your reaction, you should draw out a scheme like this:
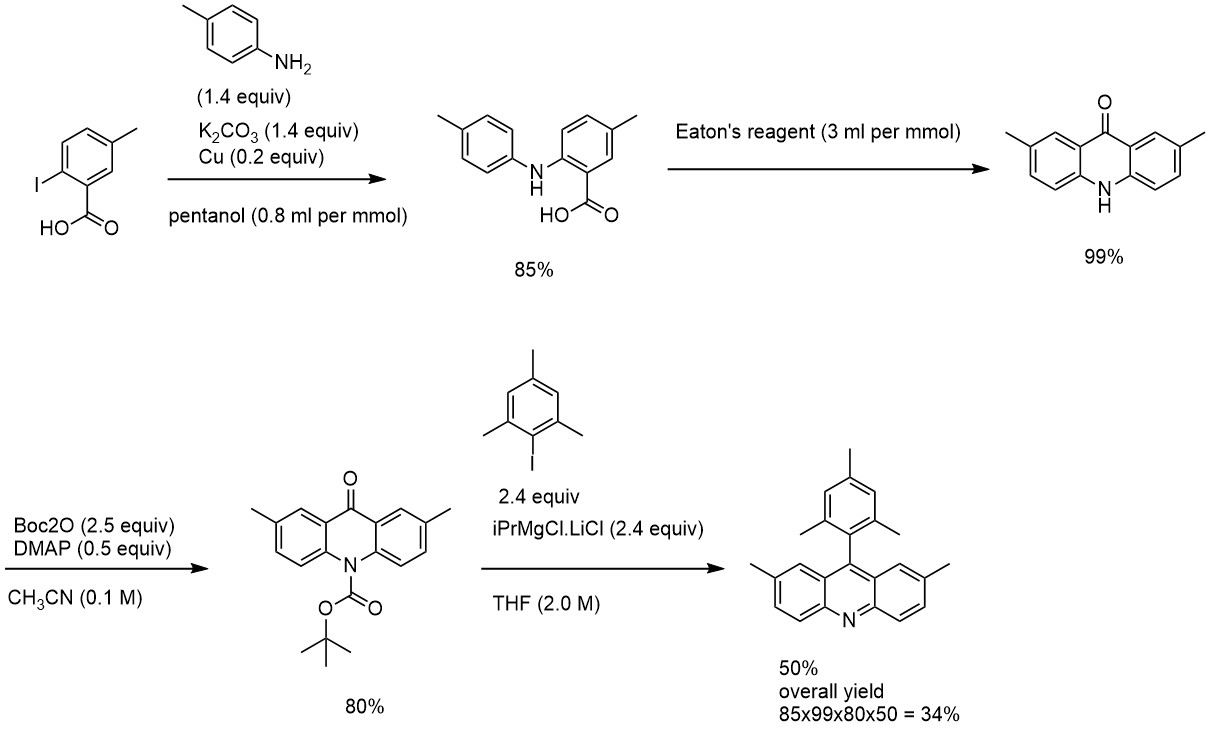
With the scheme in place, we can do the reaction plan. For the targeted 250 mg of final compound (or 0.76 mmol), considering an overall yield of 34%, the sequence should start from 2.2 mmol or 583 mg of iodobenzoic acid. Depending on skills and overall confidence in the reaction sequence, the amount of starting material can be adjusted. In most cases, a safety margin of 100% makes the reactions manageable. This means that a chemist can comfortably begin with 4.4 mmol or 1.2 g of starting material and arrive at the targeted 250 mg.
Accordingly, the entire sequence can be calculated: 660 mg of aniline, 850 mg of K2CO3, 52 mg of Cu, 11.2 mL of Eaton's reagent, 2.0 g of Boc2O, 225 mg of DMAP, 1.7 g of mesityl iodide, and 5.5 mL of iPrMgCl.LiCl.
Planning in this way allows for the logical purchase of starting materials and minimises delays due to the unavailability of reagents. Furthermore, the plan helps with the overall organisation of the work. If you realise halfway through the synthesis that you do not have enough material to finish, it might be worth investing time in repeating the steps to meet the goal of the synthesis.
Failing to plan is planning to fail.
Labjournal - the group standard (Author: Peter)
A lab journal is an integral part of the research and must be carefully prepared. We are using an electronic format at https://elabjournal.rug.nl/login/. On your first day, you will be provided with access and a three-letter code to label your experiments. Lab journaling is a transferable skill that is generally required in all branches and types of research.
We have a format to which we adhere to. Your experiment must include the following sections: heading, rationale for the experiment, scheme, procedure, notes and observations, and a section for uploading the raw data. Here is how to fill the sections:
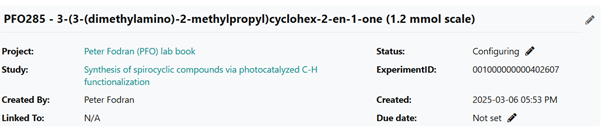
Heading: Start with the three-letter code you got on your first day. Experiments are numbered in an incremental sequence, starting with the first experiment as 1. It doesn't matter if you're redoing a failed experiment. The number must be unique. If, for some reason, we need to revisit your experiment in a couple of months, it is essential to know whether it worked initially or if the experiment is sensitive.
Next, include a ChemDraw-generated name, allowing for a structural search. A nice bit of information to include is the scale and conditions.
Rationale – really just one sentence that will make you think if the experiment is in the correct scale, relevant and moves the research forward

Scheme: Use ChemDraw and include all necessary reagents. Go to Structure -> analyse stoichiometry to generate the charge table. Fill in the charge table accordingly. This feature of ChemDraw is not flawless. For example, it cannot generate micro as a prefix but uses 2x mili. Overall, it is still helpful – when summarising the project for publication or the report, you must draw reaction schemes. In this way, you prepare them as you move through the project; thus, you will save time down the road.
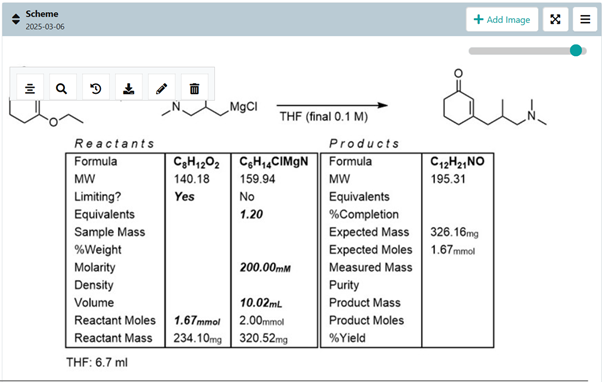
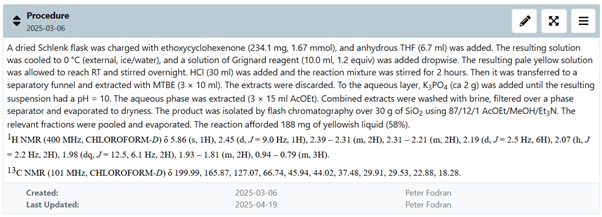
Procedure: Ideally, you write this as you are experimenting. Typically, there is plenty of waiting time during reactions, so why not write down what have you done? Style-wise, the procedure should be written in a passive voice because the action is more important than the person who did it. Limit the decimals to one digit. I prefer that the limiting reagent is written in mmols and the rest is in equivalents. It makes the procedure logical. Technically, the procedure has four distinct parts -the reaction part, work-up, purification and conclusions, which provide a logical structure. The reaction part describes how you set and conduct the reaction. Work-up describes all the actions that you have done from concluding that the reaction is terminated until you have a crude product.In most cases, this is some form of hydrolysis and extraction. Purification describes the operations you have done to obtain an acceptably pure compound. Conclusions provide information on the mass, yield in % and physical form of the target compound.
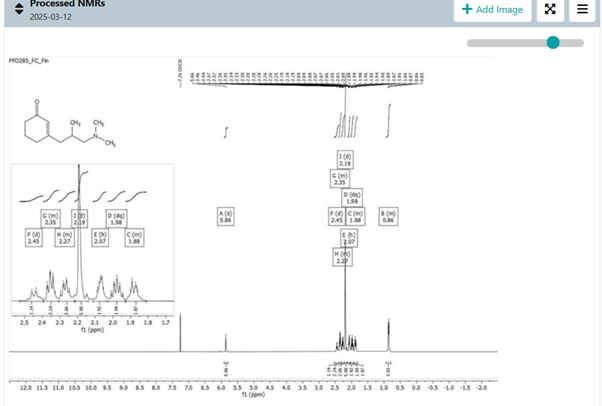
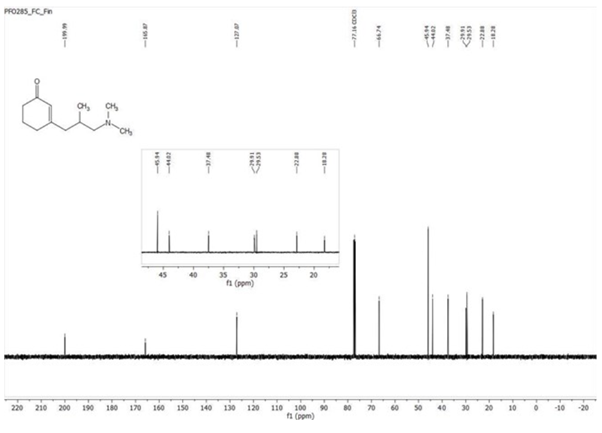
A well-written procedure also contains a write-up of the NMR spectra. A pro tip is to correct the typos and subscripts/superscripts as you write the procedure. It saves a lot of time.
The files section includes all the raw and processed data that you generate as you move through the experiment.
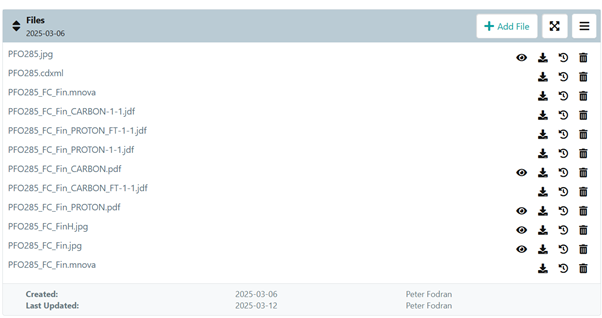
We must store the raw data in a form that makes it easy to retrieve. More importantly, there is a chance that you will have to revisit the experiments you did. If you pay attention and store even the processed data, it will save you a lot of time.
Next is the section for observation and conclusions. In the presented experiments, this is empty because the experiment went smoothly, and there were no issues along the way. Not all of them are like this, and that is natural. In this section, you can write notes for the next experimenter, which might make their life easier.

The bonus at the end – if you want to do outstanding work, you can place the processed data at the end of the experiment. For example: